Tools for your docs: Docusaurus and MkDocs Material
8 minute read
The goal is to help you choose a documentation tool that uses docs-as-code, Markdown, and doesn’t require much time to deploy.
Introduction
While there are many documentation tools for technical writers, sometimes even experienced tech writers ask themselves: which tool should I use for my project? Your project may be API Reference or end-user documentation, online help for your product, or any other domain. In this article, I focus on the customer-facing docs, not the internal documentation that you write in wiki systems like Confluence or CMS like SharePoint Online. You can have authentication or password protection for your customer-facing docs site, of course.
Ok, so your manager or your test task requires you to come up with the best documentation solution for their product/API/you name it. They may even offer you some hints like Word, SharePoint, or even some unknown commercial tools for building docs sites. The first question I would ask, is whether they’ve been using this tool before and satisfied with it. If both answers are yes, maybe it’s not worth convincing them that your tool would do a better job. However, you can still create a demo site or show them available projects built with Docusaurus or MkDocs Material static site generators.
Docusaurus and MkDocs Material
Have you heard about Docusaurus and MkDocs Material? These are static site generators (SSGs) that build a static documentation site. These SSGs use the docs-as-code approach, Markdown, and git. They’re designed specifically for technical writers or developers who want to stand up a nice-looking docs site effortlessly and quickly. I wrote a comprehensive guide how to start working with Docusaurus a couple of years ago. As this tool is developed, some things could have changed. That’s why I’m going to go step by step again to deploy a Docusaurus documentation site.
MkDocs Material has long been on my list of the best SSGs for documentation sites. Material theme of MkDocs is designed for documentation writers. It has many features, you’d better consult their documentation.
Docusaurus
The goal is to build and deploy a test Docusaurus site. You can then reproduce the steps to build your own docs site and deploy it to public GitHub Pages.
Prerequisites
You need to have the following items installed on your computer.
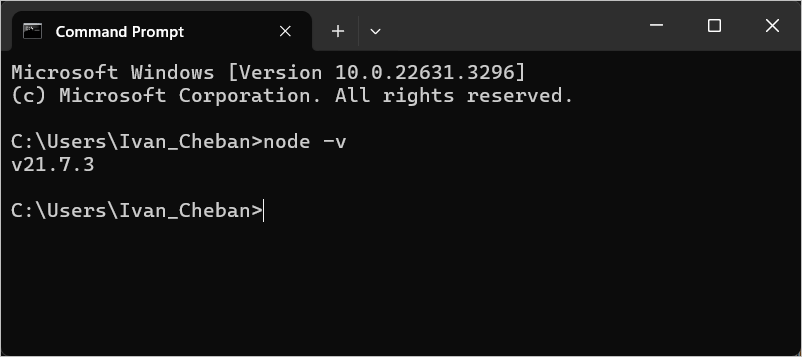
Node.js
You can check if it’s already installed by typing node -v in the terminal or Command Prompt. You need v.18 or later.
If you have an older version, remove it using Windows Add or remove programs. Then install the newest version from here.
Install Docusaurus package
Use Node.js command to install Docusaurus on your computer:
-
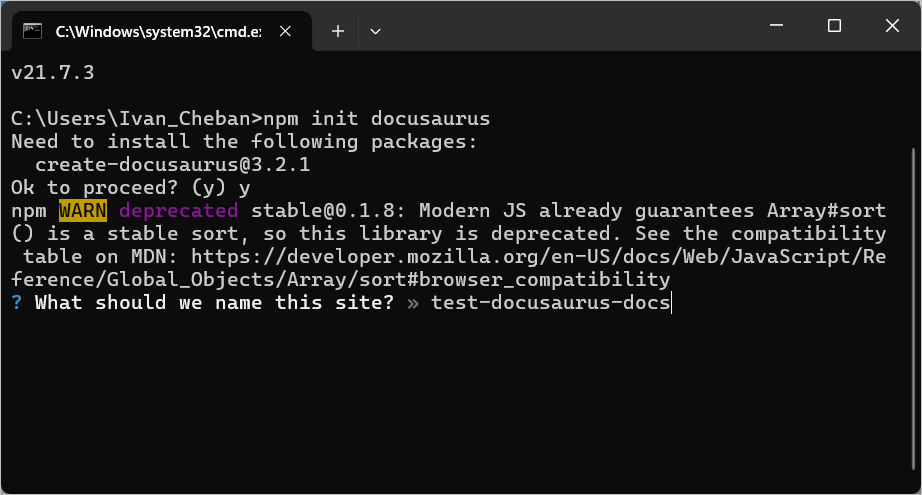
Run
npm init docusaurus. -
Type
ywhen prompted and press Enter.
-
Type the name of your site (project) when prompted and press Enter.
-
Select the recommended
classictemplate by pressing Enter.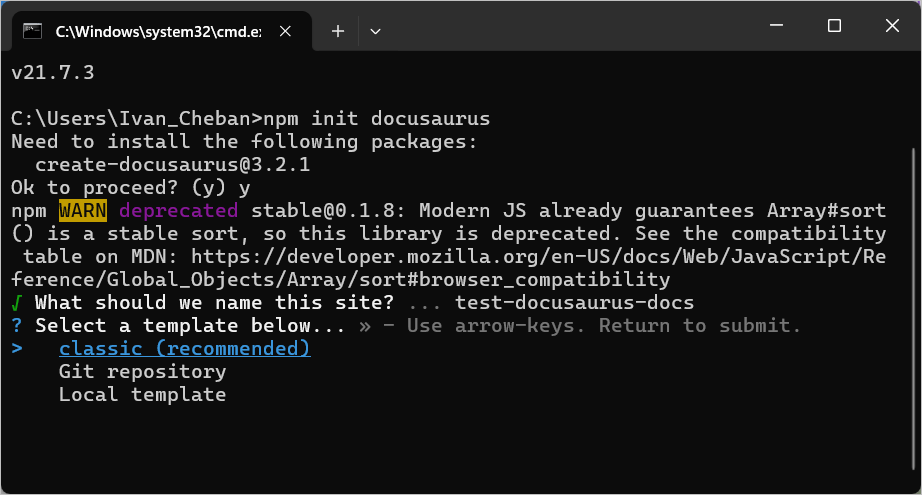
-
Select JavaScript by pressing Enter.

-
Type
cd test-docusaurus-docsto go to the folder with installed Docusaurus. -
Type
npm startto start a hot reload server for opening the docs site in your browser on local host.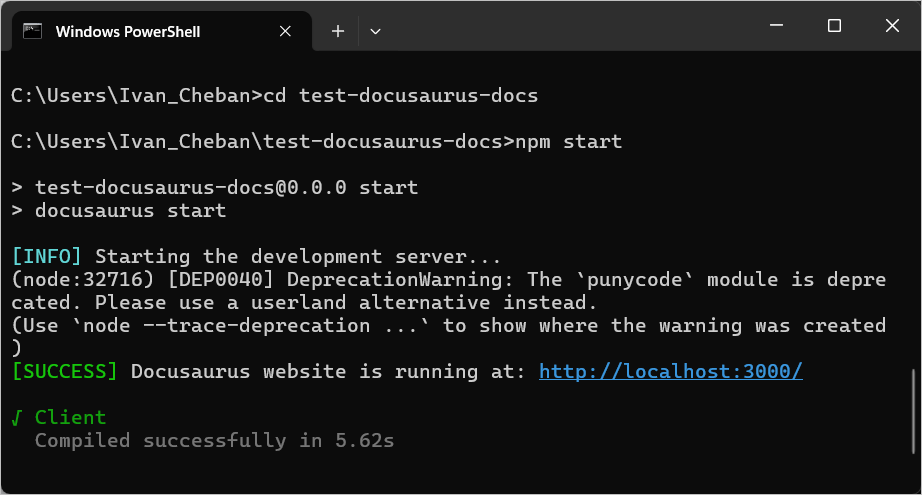
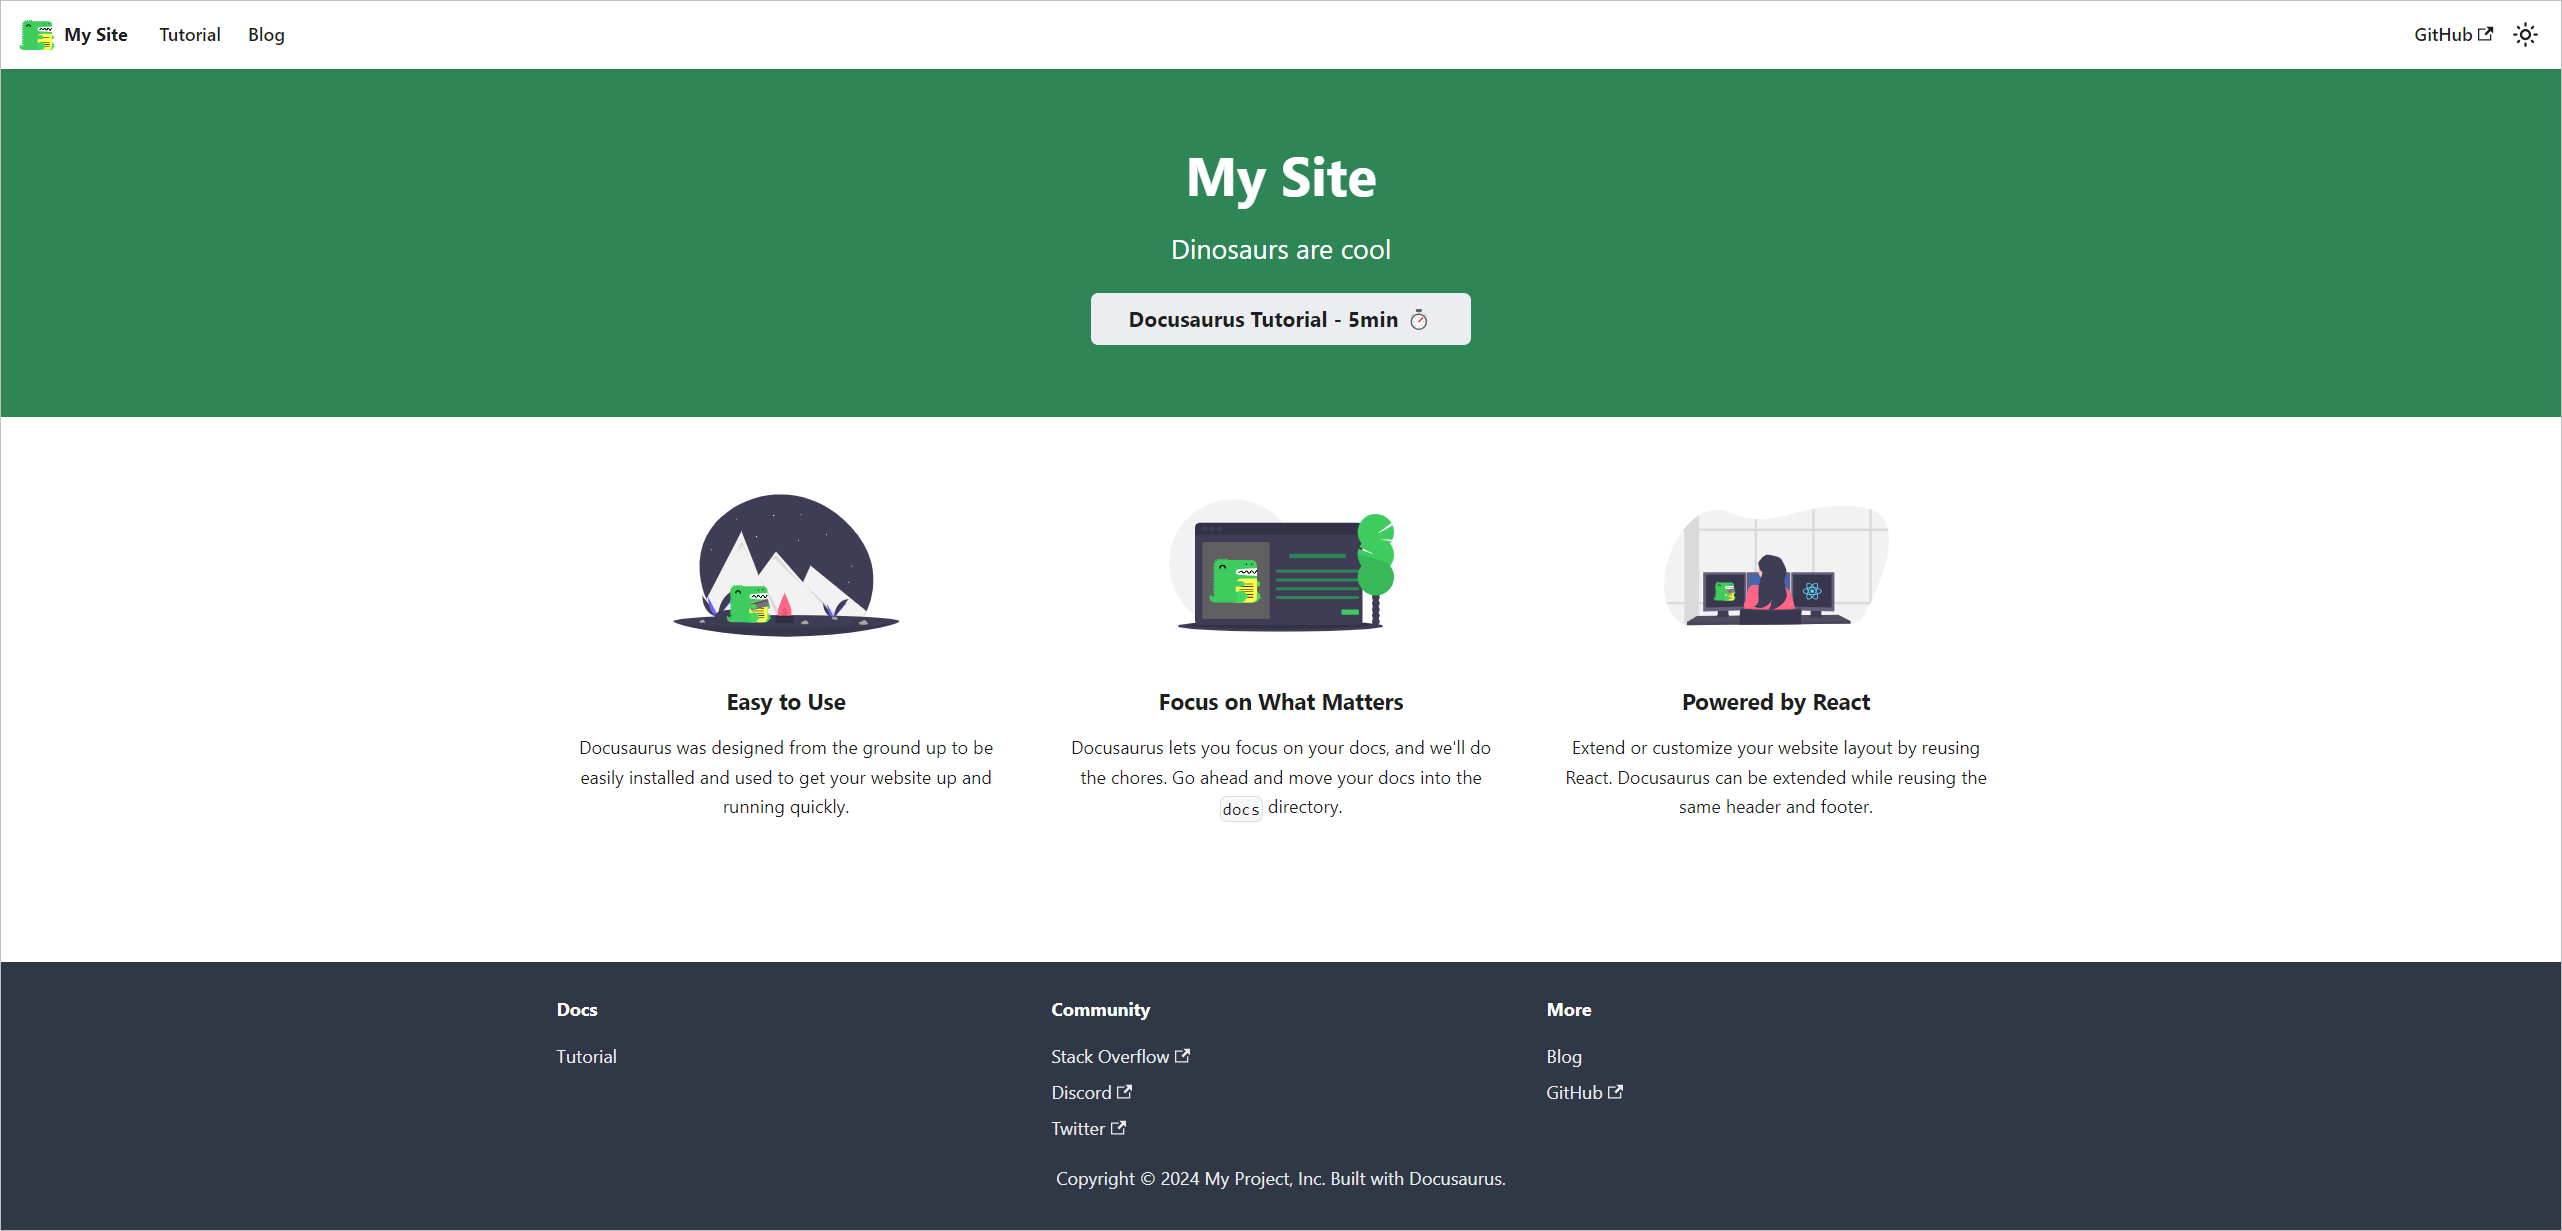
Your site opens in the browser with this address: http://localhost:3000/
Deploy Docusaurus to GitHub Pages
Now that you’ve built your site locally, you can start editing its content in Markdown and customize the site theme: CSS, logo, name, sidebar menu, etc. I don’t intend to show all these steps as I’ve described them here. Instead I will provide instructions on deploying your site to GitHub Pages, so it’s available on the internet.
-
Use VS Code to open your Docusaurus project: File > Open Folder… and select your project name that you typed when installing Docusaurus. In my case, it’s
test-docusaurus-docs. -
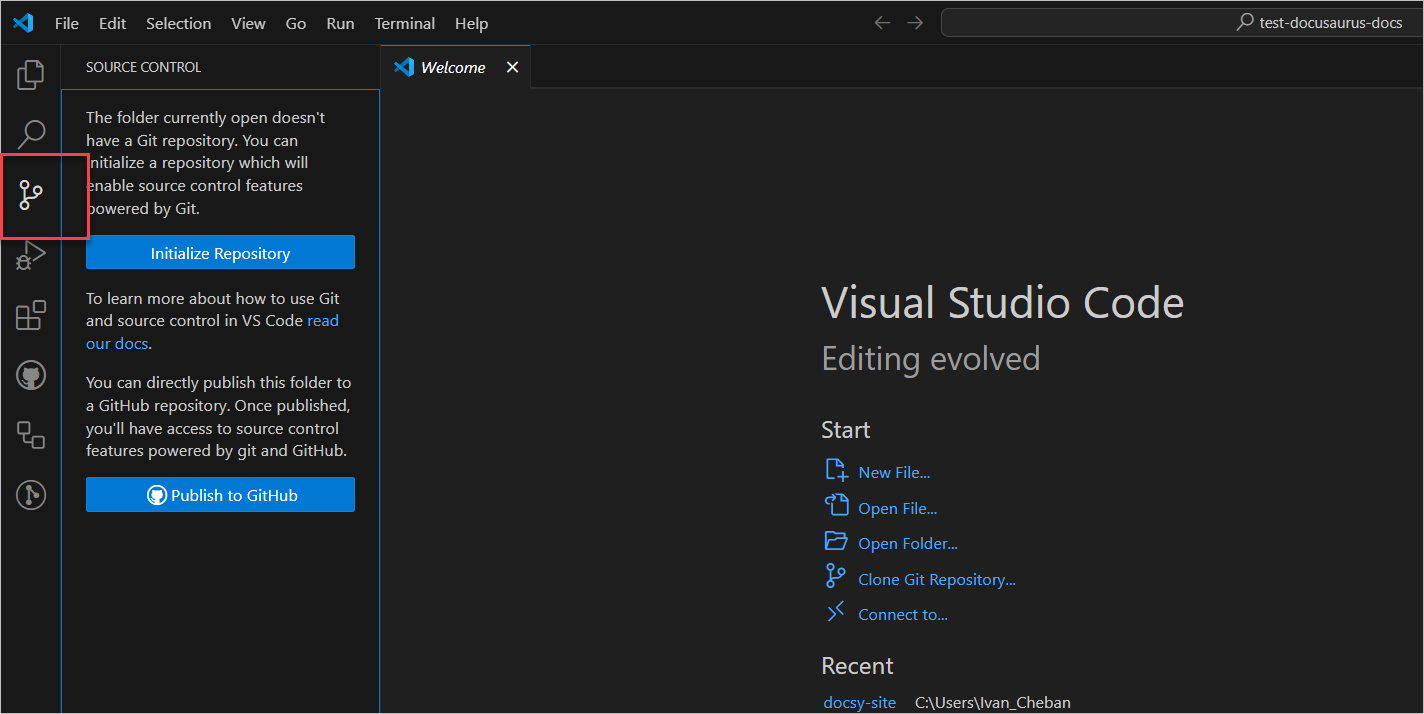
Select Source Control tab in VS Code left side panel.
-
Select Initialize Repository.
-
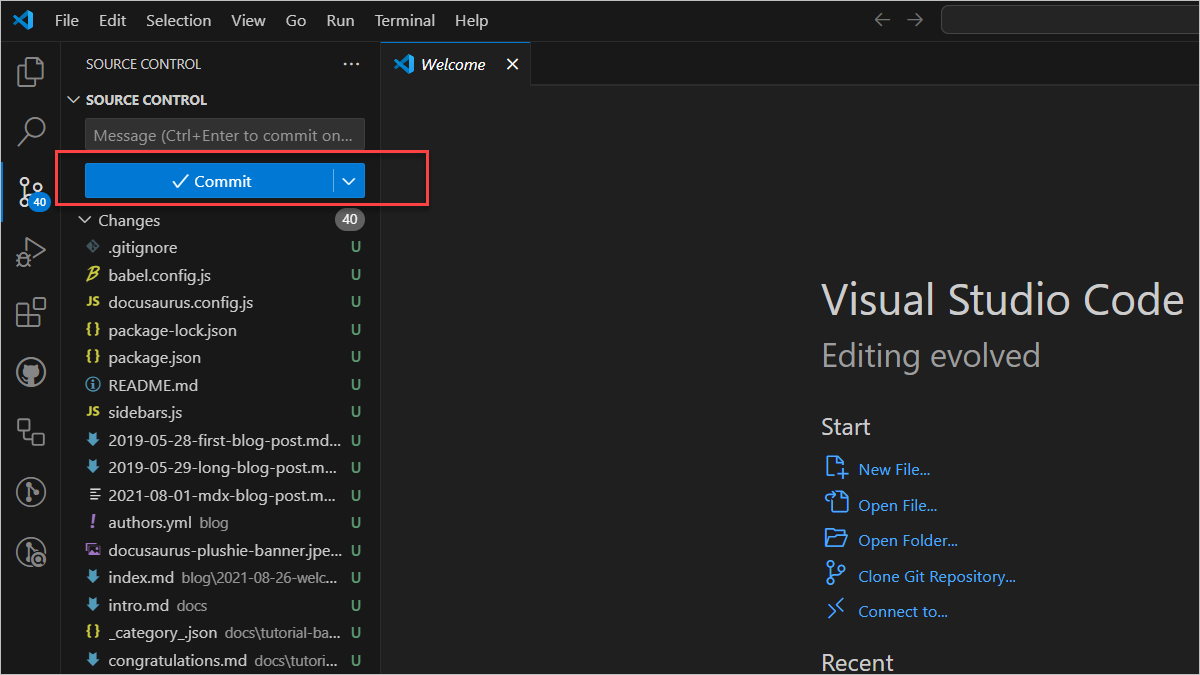
Select Commit.
-
Enter the commit message. For example: first commit. Press Enter.
-
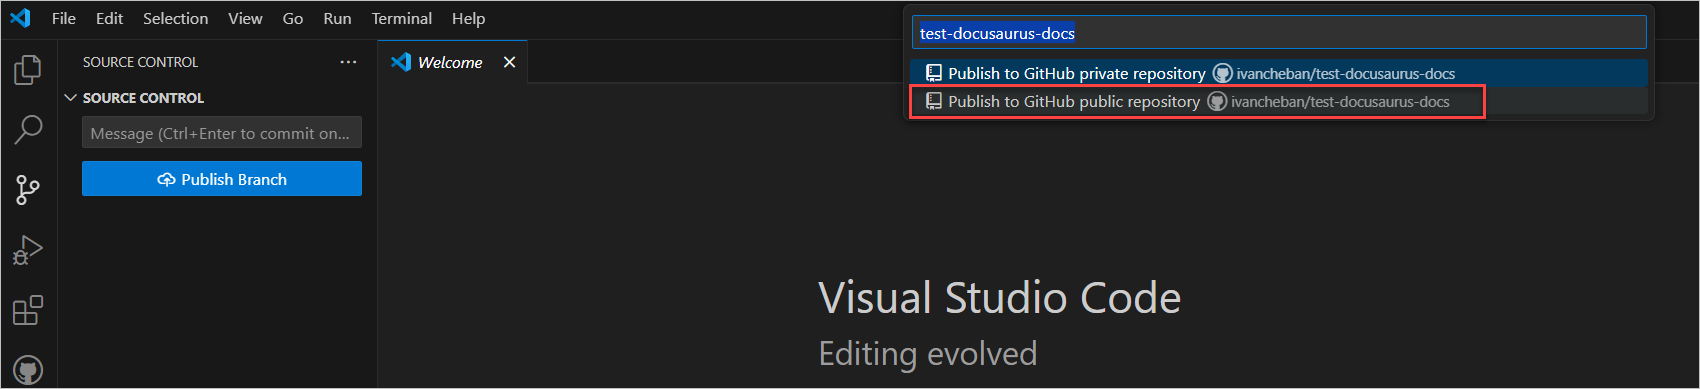
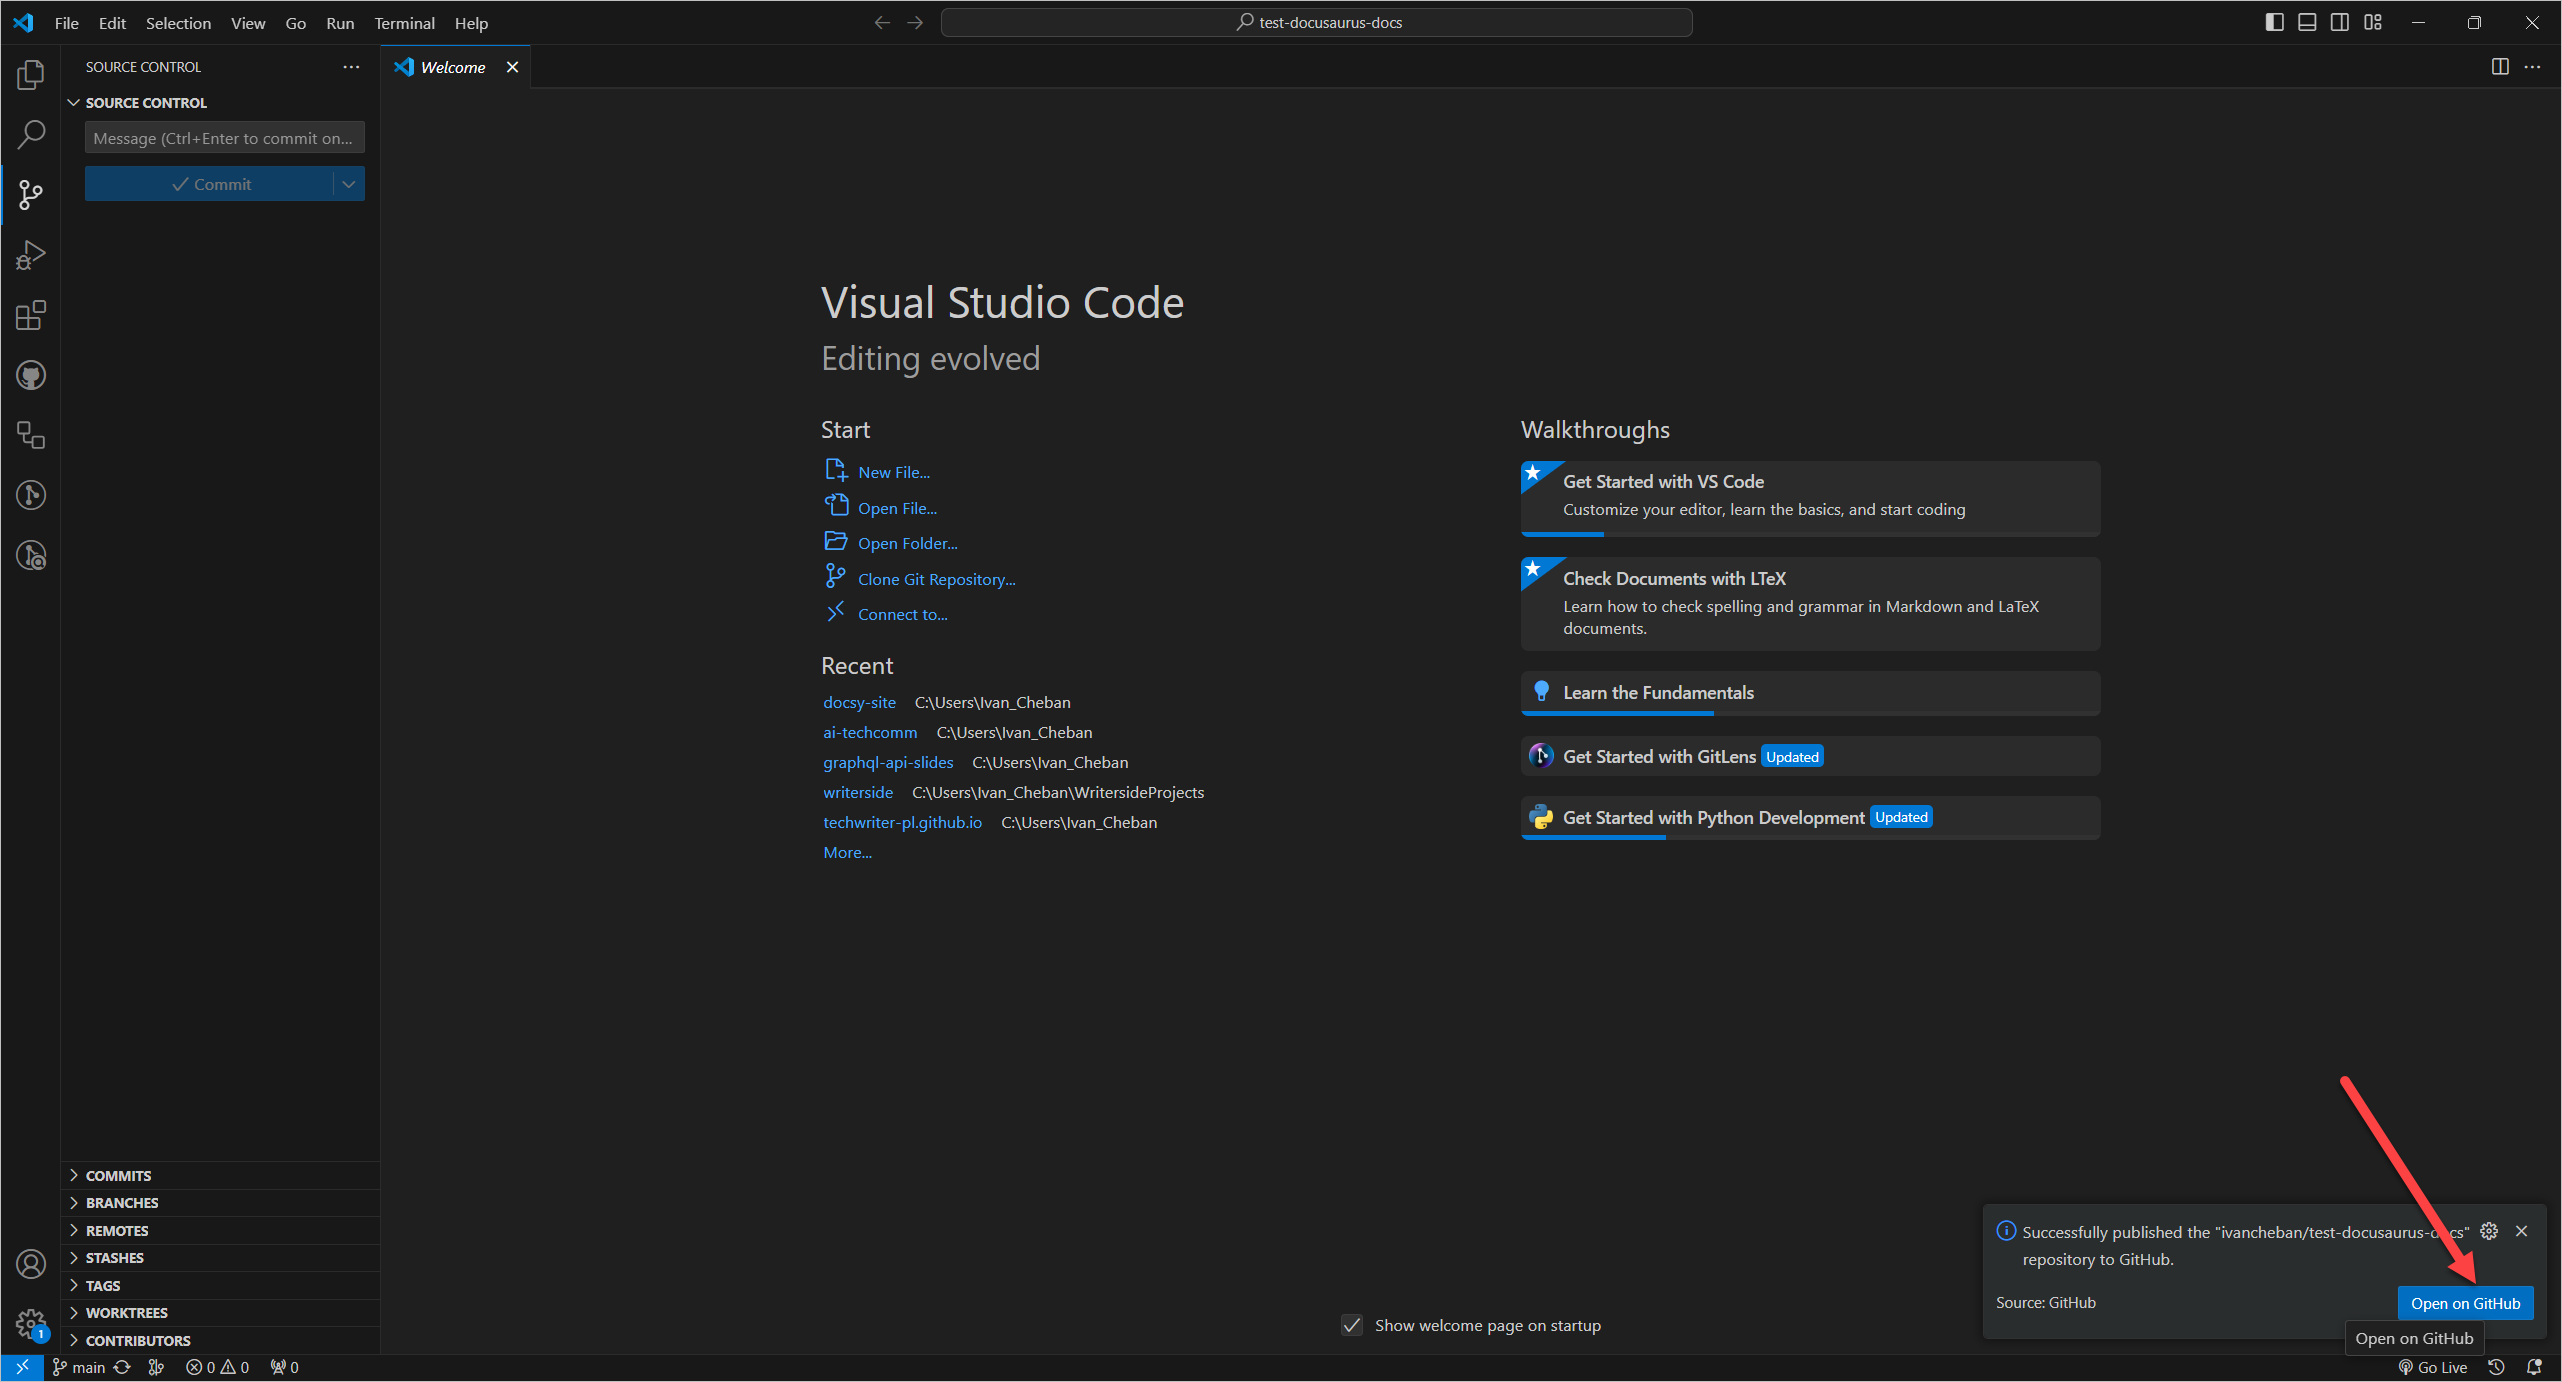
Select Publish Branch.
-
Select Publish to GitHub public repository.
-
Select Open on GitHub to open the project in the web version of GitHub.
To deploy your site on GitHub Pages:
-
In VS Code, go to Explorer tab and select the
docusaurus.config.jsfile that stores configuration of your Docusaurus site. In my case, the path isC:\Users\ivanc\test-docusaurus-docs\docusaurus.config.js. -
Change the values for the following parameters:
-
organizationName- In my case, it’sivancheban, my GitHub account. -
projectName- In my case, it’stest-docusaurus-docs, your Docusaurus project name you selected and published to GitHub. -
url- In my case, it’shttps://ivancheban.github.io. -
baseUrl- In my case, it’s/test-docusaurus-docs/.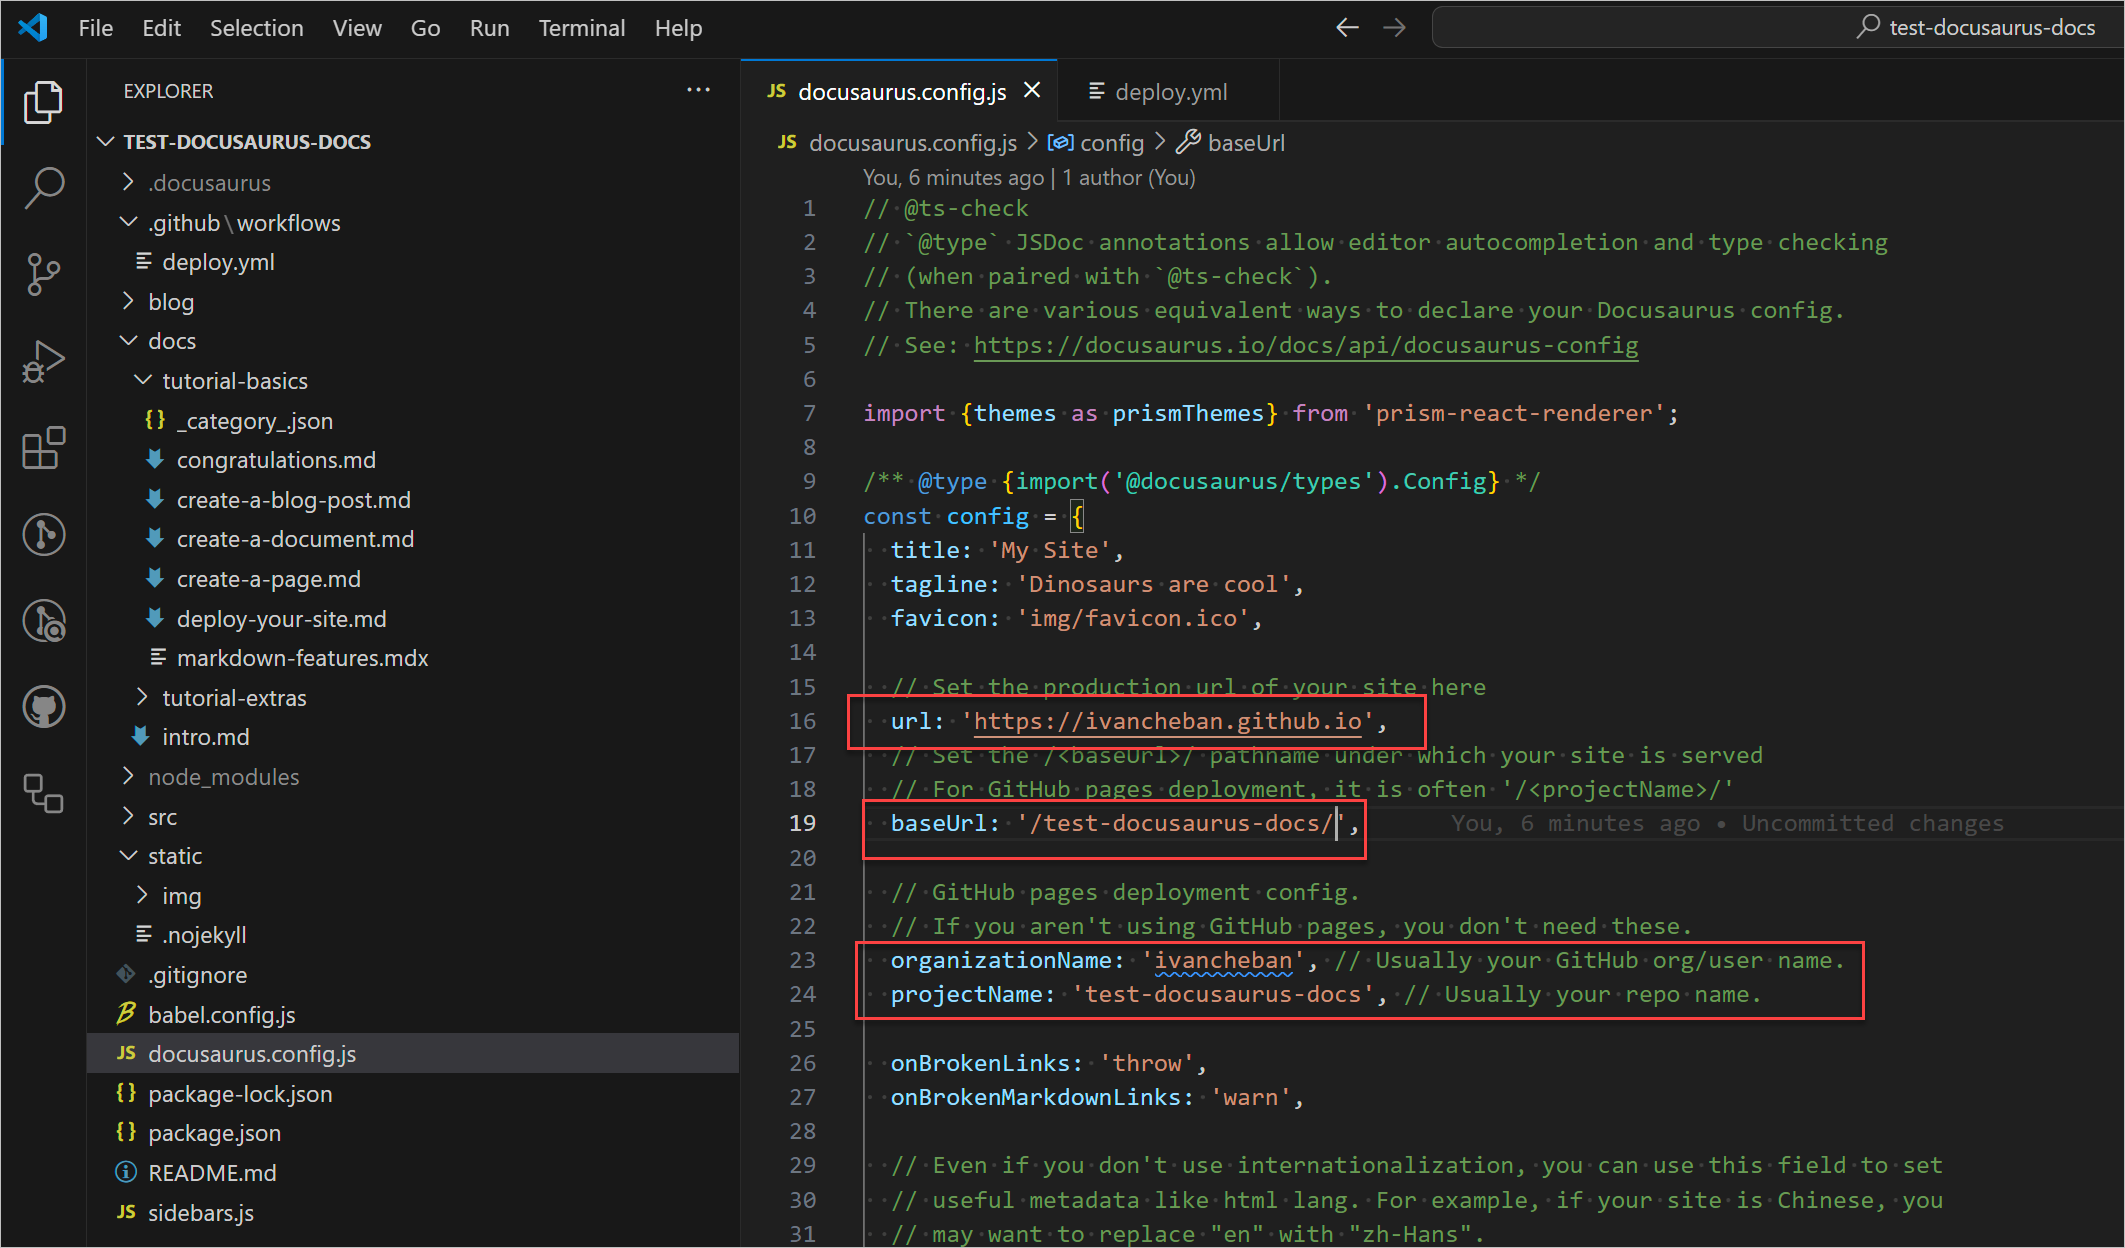
-
-
In the root folder of your Docusaurus project, create the
deploy.ymlfile with this path:.github/workflows/deploy.yml. It means that first you create the.githubfolder, thenworkflowsfolder inside it, and only then thedeploy.ymlfile. Paste the following code inside thedeploy.ymlfile.
name: Deploy to GitHub Pages

on:
  push:
    branches:
      - main
    # Review gh actions docs if you want to further define triggers, paths, etc
    # https://docs.github.com/en/actions/using-workflows/workflow-syntax-for-github-actions#on

jobs:
  build:
    name: Build Docusaurus
    runs-on: ubuntu-latest
    steps:
      - uses: actions/checkout@v4
        with:
          fetch-depth: 0
      - uses: actions/setup-node@v4
        with:
          node-version: 18
          cache: npm

      - name: Install dependencies
        run: npm ci
      - name: Build website
        run: npm run build

      - name: Upload Build Artifact
        uses: actions/upload-pages-artifact@v3
        with:
          path: build

  deploy:
    name: Deploy to GitHub Pages
    needs: build

    # Grant GITHUB_TOKEN the permissions required to make a Pages deployment
    permissions:
      pages: write # to deploy to Pages
      id-token: write # to verify the deployment originates from an appropriate source

    # Deploy to the github-pages environment
    environment:
      name: github-pages
      url: ${{ steps.deployment.outputs.page_url }}

    runs-on: ubuntu-latest
    steps:
      - name: Deploy to GitHub Pages
        id: deployment
        uses: actions/deploy-pages@v4
Continue to deploy your site to GitHub Pages:
-
Commit and push your changes:
Ctrl + Shift + P.- Select
Git: Commit All. - Add the commit message.
Ctrl + Shift + P.- Select
Git: Push.
-
Create a
gh-pagesbranch in your Docusaurus project. Although you commit and push to themainbranch, thegh-pagesbranch will be used for deployment of your site on GitHub Pages. -
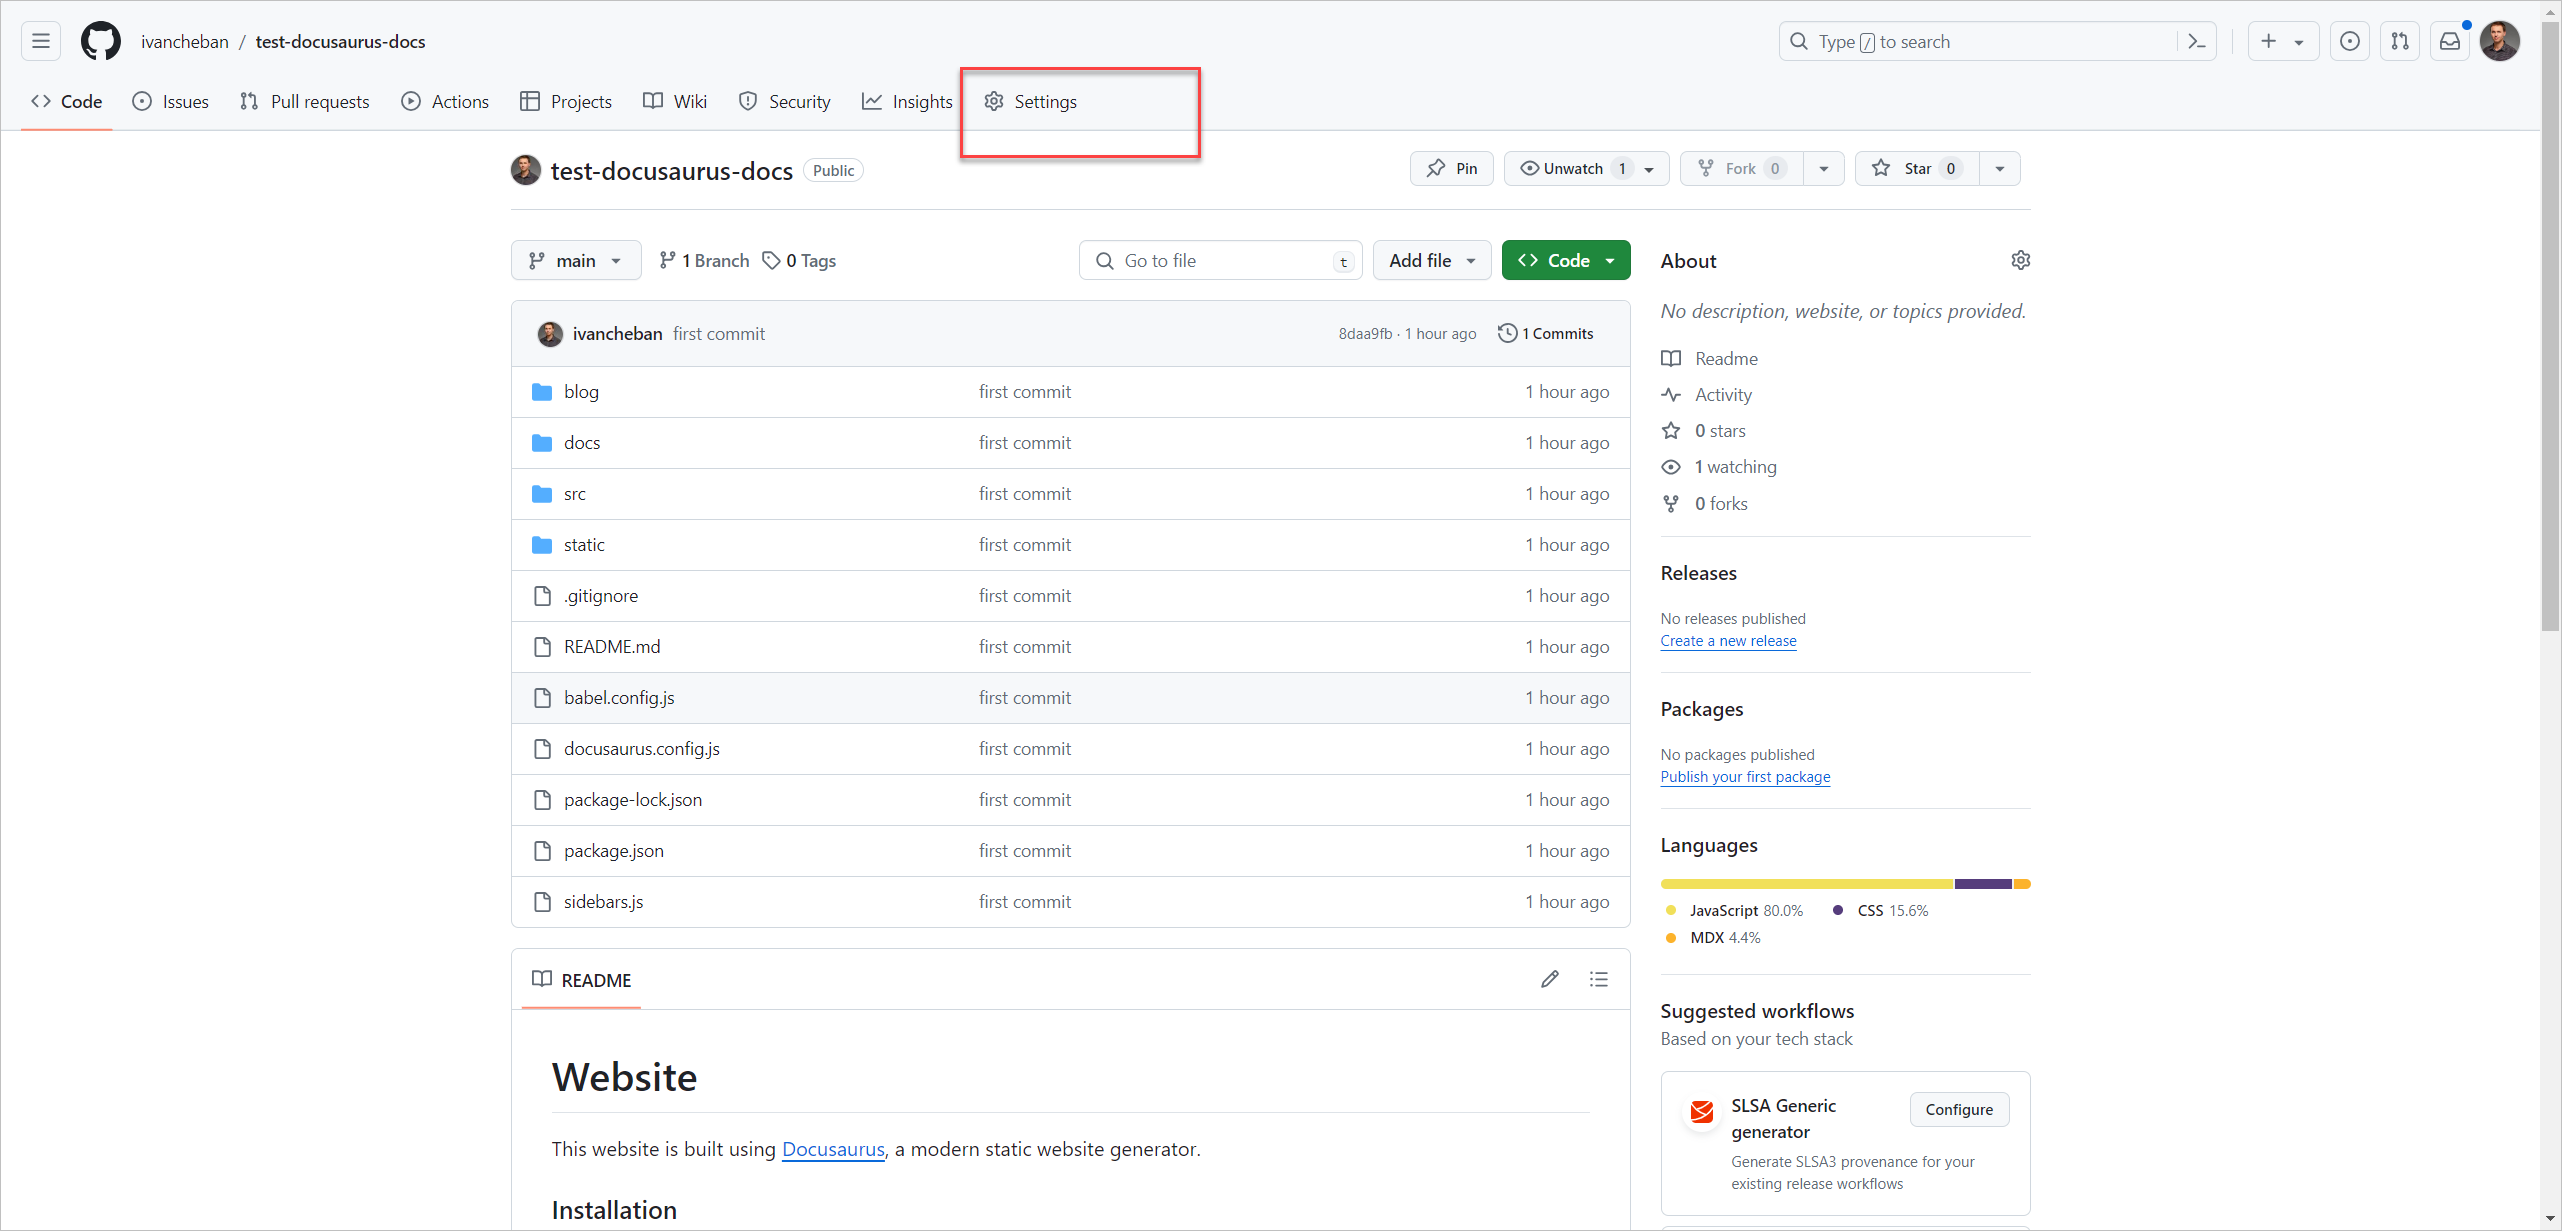
Go to Settings in GitHub page of your project.
-
Select Pages and select the
gh-pagesbranch. Save the changes.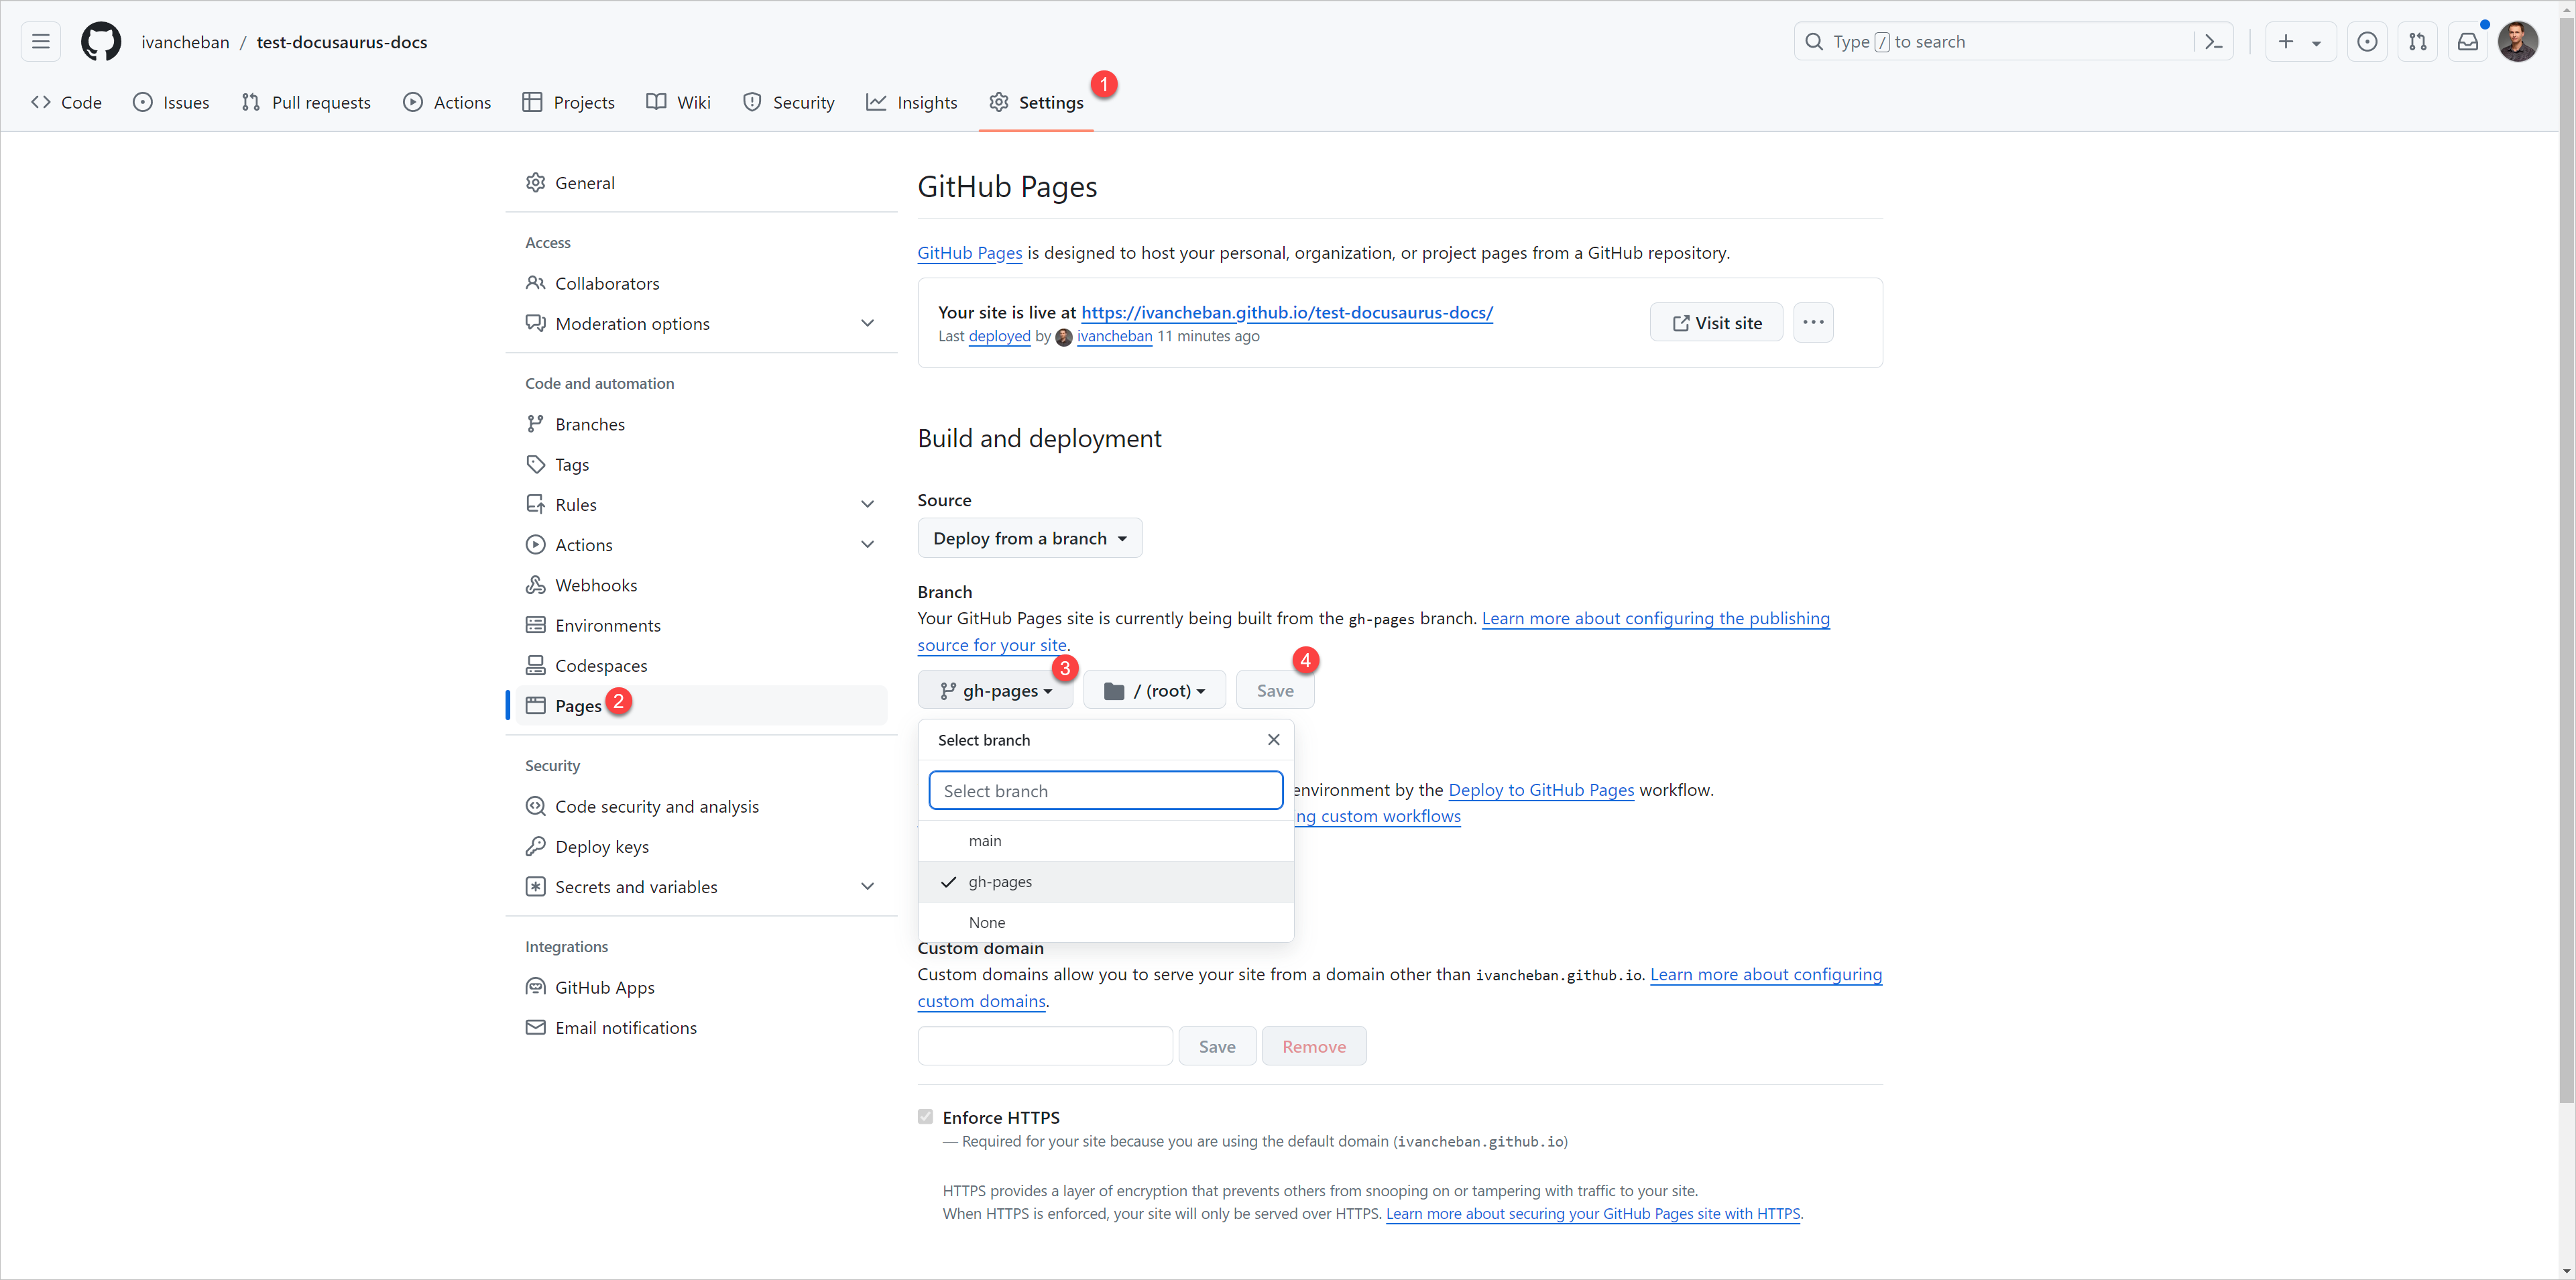
-
Go to Settings > Environments and remove the
gh-pagesfrom the limitation.
-
Change anything in your local files, commit and push changes. The commit to the main branch starts the site deployment. Wait while the pipeline finishes building and deploying your site. Check the built site. In my case, it’s: https://ivancheban.github.io/test-docusaurus-docs/.
MkDocs Material
The goal is to build and deploy a test MkDocs Material site. You can then reproduce the steps to build your own docs site and deploy it to public GitHub Pages.
Prerequisites
You need to have Python with pip for MkDocs. Then you can install MkDocs and the MkDocs Material packages using pip.
-
Ensure Python is installed: You can check if Python is installed on your system by opening a command prompt and typing
python --version. If Python is installed, you will see something likePython 3.11.3. If you don’t have Python installed, install it from their official website. -
Ensure pip is installed: You can check if pip is installed by typing
pip --versionin the command prompt. If pip is installed, it will display the version. -
Install MkDocs: Type
pip install mkdocsin the command prompt. Make sure MkDocs is installed by typingmkdocs --version. -
Install MkDocs Material: Type
pip install mkdocs-materialin the command prompt. To check if MkDocs Material is installed, typemkdocs serve --help. This command should list material as an option under the--theme. If material is listed, it means that Material for MkDocs is installed correctly.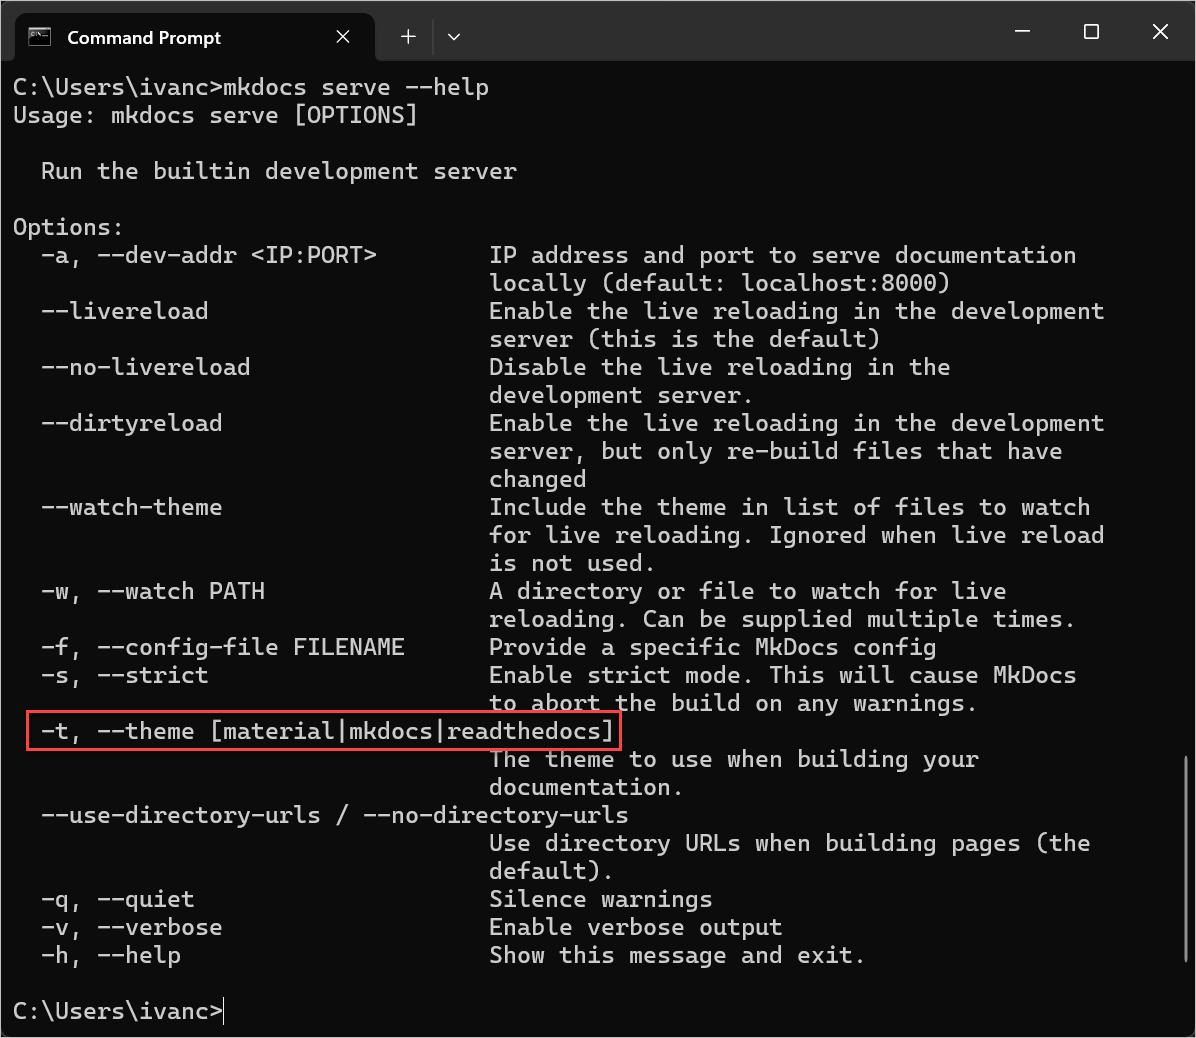
For more information, see MkDocs Installation and MkDocs Material Installation.
Install the MkDocs site
You can continue creating a brand new MkDocs Material site using these instructions. Or, you can fork my repo with the ready configuration:
-
Fork or download the zipped project from here: https://github.com/ivancheban/my-project.
-
Open the
mkdocs.ymlfile to edit the configuration of your site.
site_name: Docs site
site_url: https://ivancheban.github.io/my-project/
nav:
    - Introduction: 'index.md'
    - User Guide:
        - 'Test': 'test-folder/test.md'
        - 'Test 1': 'test-folder/test1.md'
        - 'Test 2': 'test-folder/test2.md'
    - About:
        - 'About this site': 'about.md'
theme:
  features:
    - navigation.footer
  name: material
  custom_dir: overrides
  logo: img/logo.svg
  favicon: img/favicon.ico
  palette:
    scheme: default
    accent: light blue

extra_css:
  - stylesheets/extra.css

plugins:
  - search
  - mike

extra:
  version:
    provider: mike
  social:
    - icon: fontawesome/brands/github
      link: https://github.com/ivancheban
    - icon: fontawesome/brands/linkedin
      link: https://linkedin.com/in/ivan-cheban-a24b576
  generator: false

markdown_extensions:
  - pymdownx.superfences:
      custom_fences:
        - name: mermaid
          class: mermaid
          format: !!python/name:pymdownx.superfences.fence_code_format
  - admonition
  - pymdownx.details
  - pymdownx.tabbed:
      alternate_style: true
copyright: Copyright © 2023 Ivan Cheban
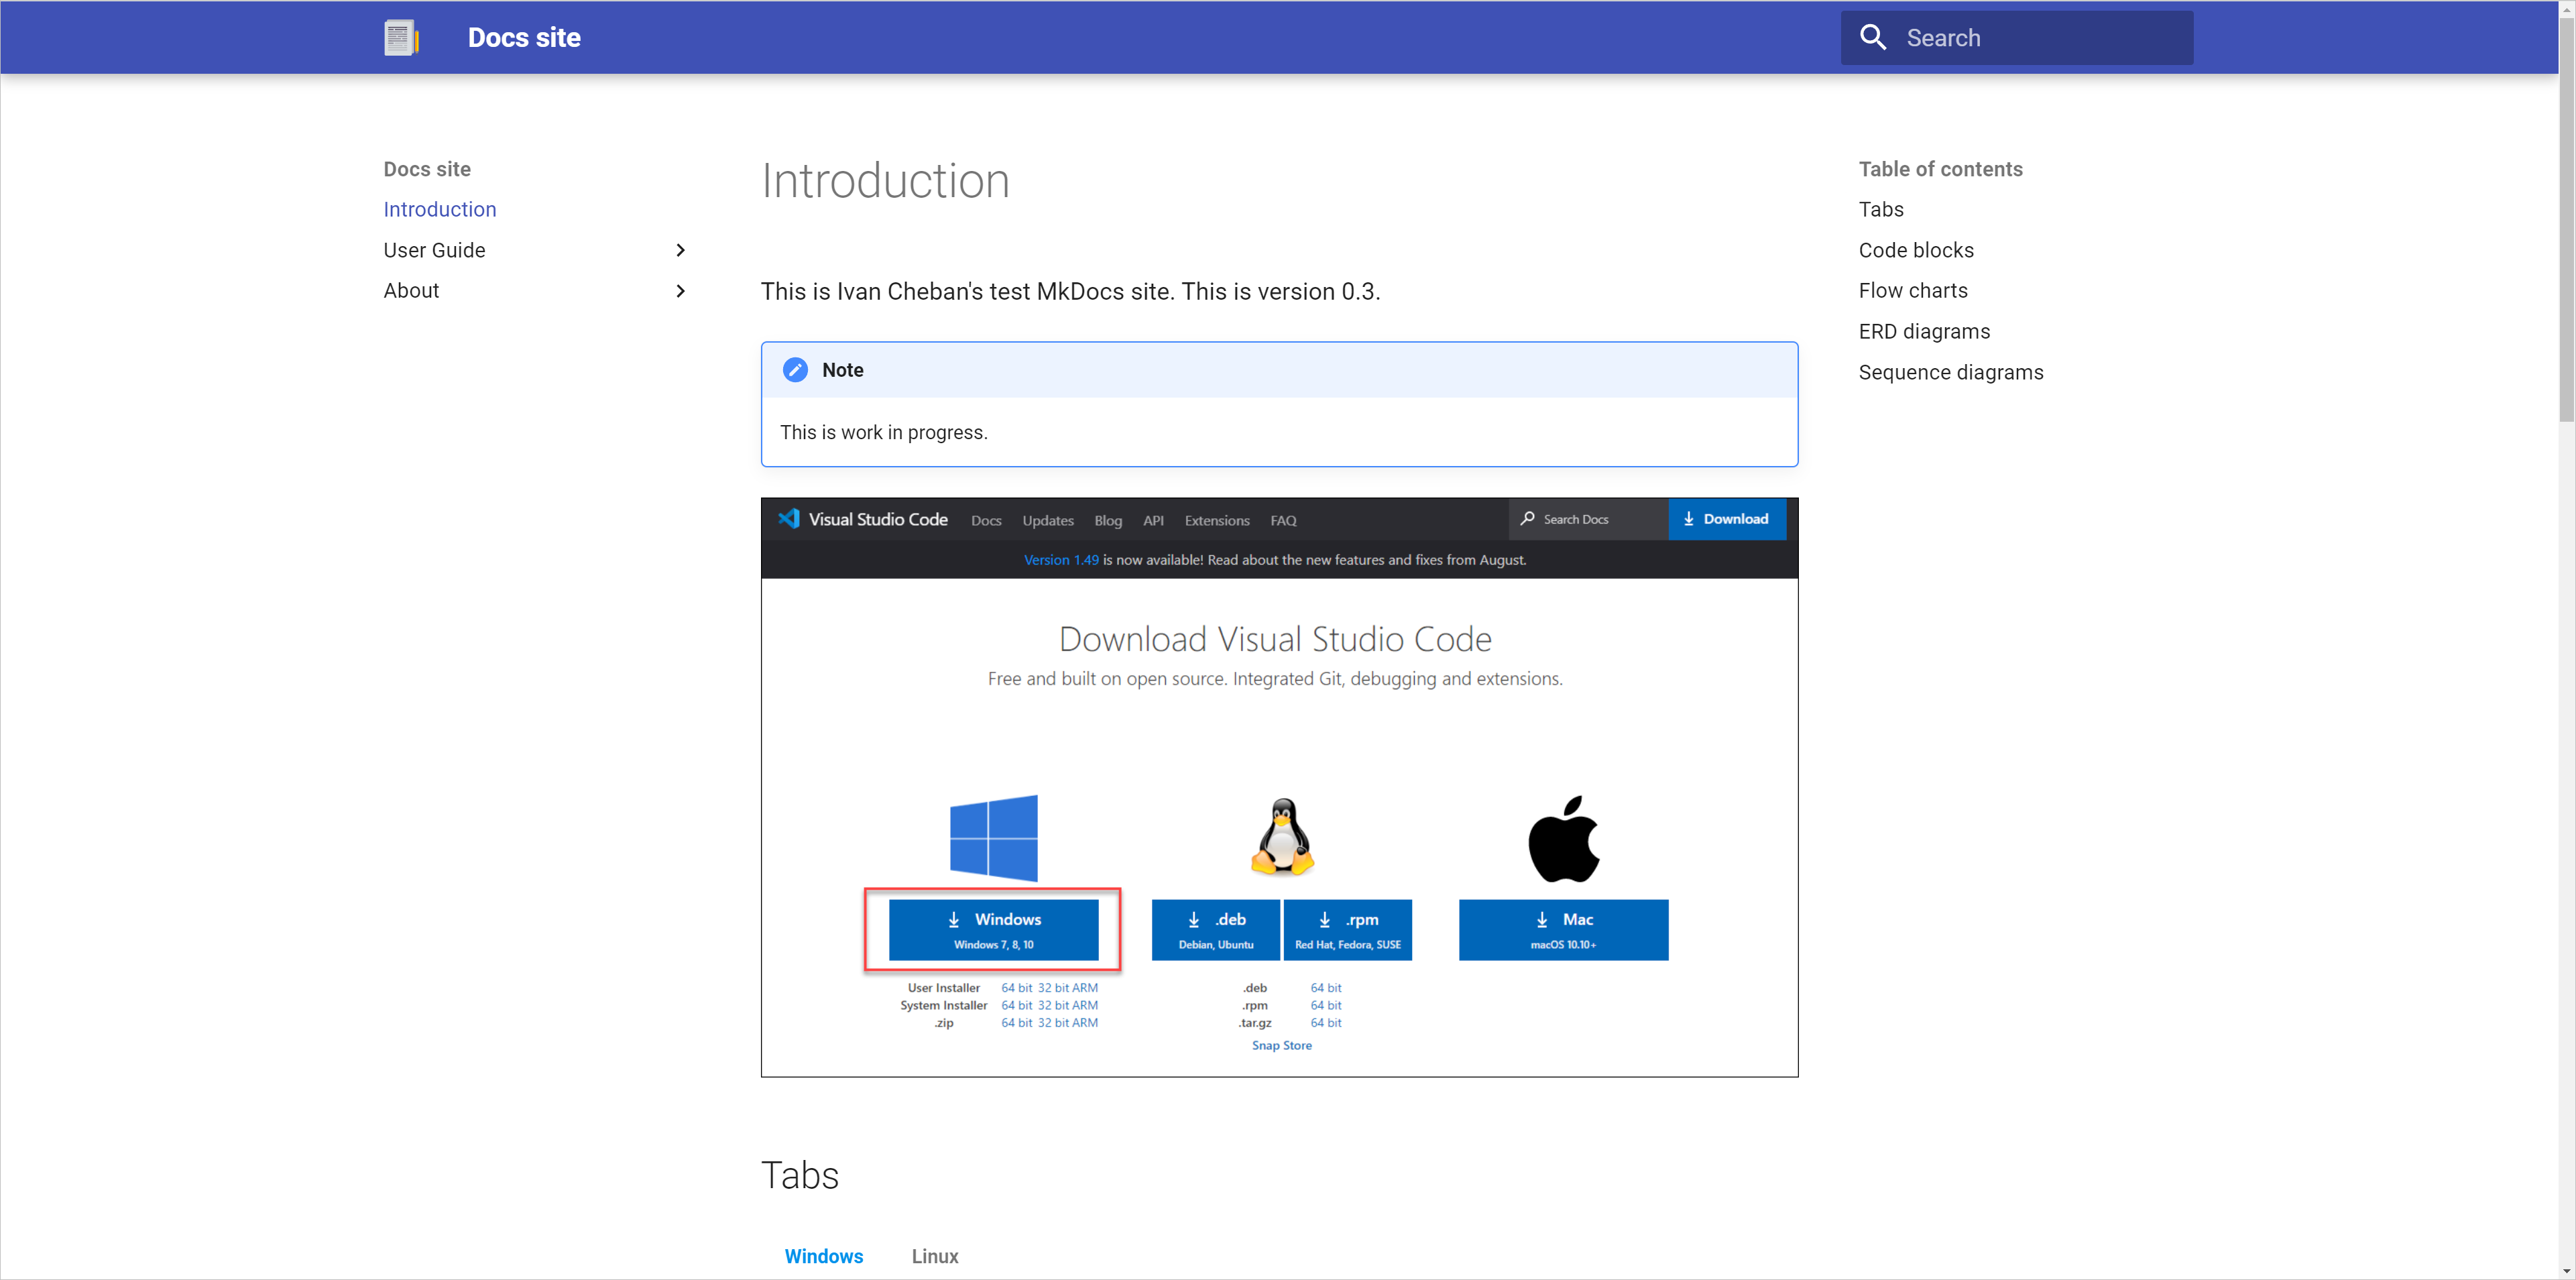
To run the site on your local host, type: mkdocs serve. This starts the site in your browser with this address: http://127.0.0.1:8000/my-project/.
Deploy MkDocs Material to GitHub Pages
Now that you’ve checked that your MkDocs Material site works locally, it’s time to deploy it on GitHub as a public site.
-
Use the steps 1–8 from deploying a Docusaurus site to GitHub for committing and pushing your MkDocs project to a GitHub repository.
-
Create a
gh-pagesbranch in your repository. -
In the web interface of your repository, Go to Settings > Pages and selected
gh-pagesas a branch to deploy your site from. Save the changes. -
At the root of your MkDocs project, create a new GitHub Actions workflow file:
.github/workflows/ci.yml, and copy and paste the following contents:
name: ci
on:
  push:
    branches:
      - master
      - main
permissions:
  contents: write
jobs:
  deploy:
    runs-on: ubuntu-latest
    steps:
      - uses: actions/checkout@v3
      - uses: actions/setup-python@v4
        with:
          python-version: 3.x
      - run: echo "cache_id=$(date --utc '+%V')" >> $GITHUB_ENV
      - uses: actions/cache@v3
        with:
          key: mkdocs-material-${{ env.cache_id }}
          path: .cache
          restore-keys: |
                        mkdocs-material-
      - run: pip install mkdocs-material
      - run: mkdocs gh-deploy --force
Commit and push your changes.
Feedback
Was this page helpful?
Glad to hear it! Please tell us how we can improve.
Sorry to hear that. Please tell us how we can improve.